 CM Appliances
Home›Appliances›Sinks›Foster 3212 051 Evo Double Bowl Standard Built-In Stainless Steel Sink 116 x 50 cm
 ⌕
⌕Foster
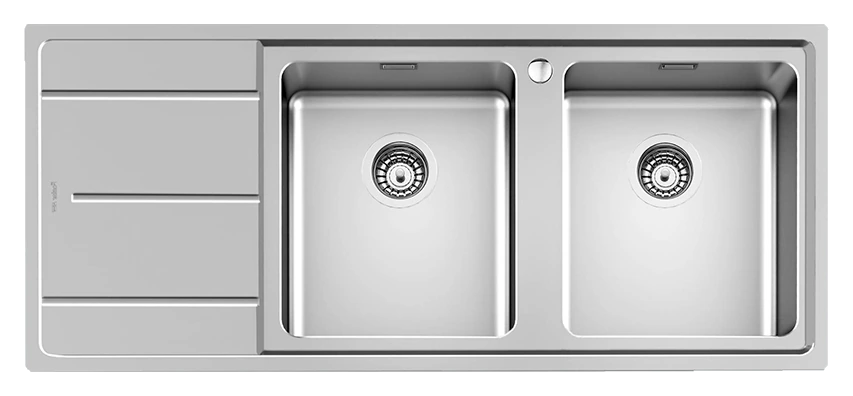
Foster 3212 051 Evo Double Bowl Standard Built-In Stainless Steel Sink 116 x 50 cm
Model / SKU: 3212 051
2,749
● Limited stock — confirmation required
Foster 3212 051 is a sink. Product details: Cut out: 1140 x 480 mm; Width: 116 cm.
Size116 x 50 cm
Dimensions1160 x 500 mm
Sink StyleTop Mount
MaterialAISI 304 Stainless Steel
Size116-x-50-cm
Check availability
Limited stock — confirmation required. Only a small quantity may remain. Please contact us so we can physically verify availability and condition before confirming your order.
Need help?·● Chat on WhatsApp
EXCLUSIVE OFFERSave 10% with code SAVE10
Regular-price items onlyDelivery · FosterDubai · Delivery timingDetails
Delivery is handled by Foster. Current timing is checked after the page loads.
InstallationInstallation not providedDetails
KitchenByPro does not provide installation for sinks and mixers. The cut out and mounting figures above are what a fitter works to.
P
ASK PRO ABOUT THIS PRODUCT
Need help deciding?
Ask about the listed outside size, cabinet fit, mounting and similar sinks. Check the manufacturer drawing before making a countertop cut.
01
PRODUCT OVERVIEW
At a glance
Foster 3212 051 is a sink. Product details: Cut out: 1140 x 480 mm; Width: 116 cm.
Key features
FormatBuilt in
Read more features (11 more)Read less
- Drainer: Yes
- Sink Evo Bowl on the Right
- Number of bowls: Double Bowl
- Glass chopping board (8631 300)
- level reaches the overfl ow; shut the tap, and
Sink typeKitchen sink
Sink StyleTop Mount
Standard FittingsBoxed Packing, Fixing Hooks, Gasket, Drain, Overflow, Siphon
FinishFoster-brushed
Waste fitting3.5 inch drain
DrainerYes
Functions and performance
appoggiare il lavello sul piano e/o sui mobili al fine di verificare che le dimensioni esterne
e dimensioni delle vasche siano compatibili con i mobili e le basi dei mobili stessi, al fine
accessori, verificare gli ingombri di questi e gli spazi residui. Analizzare anche di poter
Per installare i lavelli bisogna praticare un foro sul piano di lavoro. Dopo avere provveduto
alla preparazione del foro, provvedere a distendere il sigillante lungo il perimetro del foro
piano stringendo le viti dei ganci di fissaggio (il serraggio delle viti deve essere limitato
Tecnica in dotazione ad ogni articolo; affidarsi inoltre, a persone qualificate in lavorazioni
lavello ed il piano d’appoggio al fine di impedire possibili infiltrazioni di liquidi all’interno
1.5
Praticare un foro sul top in base alle dime e alle istruzioni contenute nell’imballo oppure
Fr fi
presso tutti i nostri Centri Assistenza sul territorio Nazionale, vi permetterà di eliminarli
limitando la fatica. Fare attenzione agli urti, alla caduta di oggetti e a utensili che possono
Nel caso di macchie persistenti provare con un pò di aceto caldo o con prodotti specifici per
worktop itself and/or on the cabinets in order to verify that the external dimensions of the
hole. Before installing the sink, please position the waste-fitting and overflow pipe (when
to meet at best the necessities of the users’, so as to obtain a high-quality product. It is
T o clean the sink, normal detergent can be used, as long as not containing hydrochloric Acid
In case of persistant staine, try to clean with some warm vinegar or with specific products for
Do not use steel sponges to clean the sink, or any other item that could scratch the surface
- Built in hole: 1140×480 mm
- Waste fitting: 3.5" drain
- Built-In Hole: 1140×480 mm
- boxed packing
- Optional accessories
- Deep bowls
- Physical Vacuum Deposition
- Perimetral overflow
- Standard, 8 mm Edge
- Head Office / Showroom Dubai
- PO Box 37959, Dubai
- Showroom Abu Dhabi
- Service Center
- Mvpappliances.com
- Istruzioni per l’installazione
- l’utilizzo e la manutenzione dei
- lavelli da cucina in acciaio inox
- Materiale lavelli: acciaio austenitico AISI 304 to 18/10
- (lavelli da cucina per uso domestico, requisiti funzionali e metodi di prova)
- Installazione
- Bordo standard e ribassato
- Prima di praticare qualsiasi foro sul piano di lavoro, suggeriamo di controllare e
- di evitare di praticare fori per lavelli di non possibile installazione.
- Consigliamo anche di verificare la possibilità di installazione di miscelatori ed altri
- avere accesso ai rubinetti di entrata dell’acqua sul muro sotto al lavello, oltre che la
- possibilità di installare il sifone.
- pieno (in caso di piletta automatica anche il relativo comando).
- Fare in modo che i bordi
- esterni del lavello vadano
- a sovrapporsi al sigillante
- creando una barriera
- all’entrata di acqua e
- sporcizia tra il lavello ed il
- piano di lavoro.
- Dopo avere appoggiato il
- lavello sul top, provvedere
- ad assicurare il lavello al
- all’arrivo in presa dei ganci sul top). Successivamente, provvedere ad asportare il
- sigillante in eccesso con un taglierino. I miscelatori possono essere installati prima o
- dopo la messa in posa dei lavelli. Dopo aver
- provveduto ad installare il lavello, collegare la
- piletta di scarico con il sifone. Fare prove di
- tenuta, ossia mettere in posizione di tenuta il
- cestello piletta, aprire l’acqua ed attendere che
- il livello raggiunga al troppo-pieno; dopodiché
- chiudere l’acqua, attendere qualche minuto
- verificando che non vi siano perdite nelle
- guarnizioni piletta e troppo pieno, e procedere
- nel svuotare il lavello.
- Bordo Filotop
- Per una corretta installazione dei lavelli Filotop attenersi scrupolosamente alla Scheda
- di fresatura con l’ausilio di macchinari a controllo numerico. Si consiglia di pulire
- accuratamente la sede e d’inserire l’apposita guarnizione isolante in dotazione, tra il
- del piano di appoggio
- stesso o delle basi
- sottostanti.
- L’operazione deve
- essere condotta da
- personale esperto.
- Non utilizzare avvitatori automatici per il
- serraggio dei ganci; la coppia di serraggio non
- deve superare i 60 N/cm.
- Si consiglia di montare i lavelli Filotop su materiali
- assolutamente idrorepellenti, per evitare eventuali
- rigonfiamenti o deformazioni del top sottostante.
- Bordo Sottotop
- Per i lavelli Sottotop procedere come per i lavelli da incasso.
- Prima di montare il lavello sigillare con silicone. Stringere i ganci di fissaggio.
- Fissaggio
- gancio sottotop
- Gancio per
- lavelli sottotop
- Sezione laterale
- gancio /f_isso
- Sistemi di /f_issaggio
- gancio scorrevole
- Fis
- Uso e manutenzione
- Le collezioni firmate da Foster sono il frutto di un’elevata esperienza e di un’attenta
- ricerca per soddisfare gli scopi previsti, ottenendo così un prodotto di grande qualità.
- importante, però informare gli utilizzatori dei nostri lavelli che alla qualità occorre
- affiancare un corretto utilizzo ed un’adeguata manutenzione.
- Come tutti i materiali anche l’acciaio Inox può sporcarsi; applicando delle indicazioni
- molto semplici possiamo comunque mantenere e anche riportare il nostro lavello alla
- sua lucentezza originale.
- Per una manutenzione giornaliera effettuare lavaggi con acqua e sapone o detersivo
- dei piatti, risciacquare abbondantemente ed infine non dimenticarsi di asciugare. Per gli
- sporchi più ostinati la Linea di prodotti STEEL CLEAN, proposta da Foster e reperibile
- graffiare quando si maneggiano utensili può essere opportuno proteggere le superfici
- d’acciaio, ad esempio con un tappetino isolante; evitare inoltre il contatto con agenti
- chimici, pulitori per metallo, sverniciatori, spazzole in metallo. Non lasciare per lungo
- tempo residui di pomodoro, di latte, di caffè, barattoli con fondo bagnato e oggetti in
- ferro in genere. Si precisa che il persistere di quanto sopra elencato sulle superfici di
- acciaio Inox può dare origine, anche se pur leggerissimo, ad un attacco corrosivo di
- natura elettrochimica.
- Attenzione
- Sciacquare accuratamente dopo l’uso con acqua ed asciugare con un panno pulito
- Per la pulizia possono essere utilizzati normali detersivi, purché non contengano Acido
- Cloridrico (Acido Muriatico commerciale) o suoi composti
- l’acciaio Inox (si consiglia la linea di prodotti: Foster Steel Clean )
- Non usare per la pulizia pagliette di acciaio o altro che possano graffiare o smerigliare
- Evitare l’uso di Acido Muriatico o Candeggina
- Non lasciare a lungo sul lavello oggetti di ferro
- Conservare il presente manuale di istruzioni
- Istructions for the installation
- use and maintenance of
- (kitchen sinks for domestic use, functional features and tests’ methods)
- Standard and flat (3 mm bended) edge
- Before making any cut-out on the worktop, we suggest to verify and lay the sink on the
- bowls are compatible with the cabinets themselves, in order to avoid making cut-outs for
- sinks that cannot be installed.
- We also recommend to verify the possibility to install taps and other accessories, by
- checking the place they need and the place that remains. Also verify the possibility to
- accede to the water main tap under the sink, and that the positioning of the siphon is
- feasible. To install the sink, one must make a cut-out on the worktop.
- Once the cut-out is made, one must position the gasket around the perimeter of the
- present); when available, also the command of the autiomatic waste-fitting must be
- installed at this stage.
- Make sure that the
- positioned upon the gasket
- so as to create a barrier
- preventing the infiltration of
- water and dirt between sink
- After having positioned the sink on the worktop, fi x it by tightening the screws of
- the brackets which are provided (the screws must be tightened just enough to have
- the brackets clamp down on the worktop).
- Afterwards, remove the excess gasket with a
- cutter. The taps can be installed before or after
- the positioning of the sink.
- After having installed the sink, connect the
- fi tting, open the tap and wait until the water
- wait several minutes, verifying that the water
- does not drain away. Empty the sink.
- Flush-mount edge
- For a correct installation of the fl ush-mount sinks, please follow strictly the technical
- sheet provided with the sink; only qualifi ed personnel should make the cut-out, and a
- computer-operated machine is necessary. It is advisable to accurately clean the seat
- for the cut-out, and to insert the gasket which is provided, between the sink and the
- The work must be carried out by experienced personnel.
- Do not use electric screwdrivers to tighten the brackets.
- The tightening torque must not exceed 60 N/cm.
- It is advisable to install the fl ush-mount sinks on hydro
- repellent materials, in order to avoid eventual deformations
- Undermount installation
- For the undermount sinks, proceed as for the normal built-in sinks.
- Make a cut-out on the worktop following the template and/or instructions provided with
- the sink. Before installing the sink, seal with silicone. Tighten the brackets.
- Fixing bracket
- system
- lateral section
- Fixing system
- /f_ixed bracket
- sliding bracket
- Fixing bracket for
- undermount sinks
- Care and maintenance
- The Foster collections are the result of a huge experience, and a careful development
- important, however, to inform our customers that one must also use the product correctly
- As all materials, also stainless steel can become dirty; by following very simple
- instructions, one can bring the sink back to its original shine.
- For everyday’s maintenance, wash the sink with water and soap, or a product to wash
- the dishes, rinse abundantly, and do not forget to dry. For more obstinate dirt, the STEEL
- CLEAN line of products, proposed by Foster and available at all our Assistance Centres
- throughout the Country, is very suitable to eliminate it without much fuss. Take care
- to avoid shocks, to drop heavy objects on the sink, and not to use utensils which can
- scratch the surface when handling tools may be appropriate to protect the steel surfaces
- for example with an insulating pad. Also avoid the contact with chemicals, cleaners for
- metal, products to take off paint, metal brushes. Do not leave for long stretches of time
- tomato residues on the sink, as well as milk, and coffee on the sink; also, avoid long
- the long contact of any of the above-mentioned substances with the sink can originate a
- corrosive attack of electrochemical nature, even though very mild.
- Attention
- Rinse accurately after use, and dry with a clean cloth
- (commercial Muriatic acid) or its derivates
- Stainless steel (the specific line of products Foster Steel clean is suggested)
- Avoid using muriatic acid or bleach
- Do not leave iron objects on the sink for long
- Please keep this instructions leaflet
Dimensions and finish
Installation type: Standard Built-In
Type: Deep Bowls
Finish: Stainless Steel
Material: aisi 304 stainless steel
Size: 116 x 50 cm
Base unit: 80 to 90 cm
Edge/Installation Type: Standard (8 mm Edge)
Finish: Foster brushed
Texture: Foster brushed
Base: 80 to 90 cm
Width: 116 cm
- Color / finish
- external edge of the sink is
- worktop, so as to avoid possible water infi ltration into the worktop or the cabinets.
Documents
- Datasheet
- Technical drawing
- Installation instructions
02
TECHNICAL DETAILS
Specifications
SKU / Model3212 051
BrandFoster
Outside dimensions (per Foster product data)1160 × 500 mm
Size116 x 50 cm
Dimensions1160 x 500 mm
Width116 cm
Installation typeStandard Built-In
Cut out dimensions1140 x 480 mm
Bowl dimensions340 x 400 mm Thickness: 1 mm
MaterialAISI 304 Stainless Steel
FinishFoster-brushed
FinishStainless Steel
FinishFoster brushed
ColorStainless Steel
Sink StyleTop Mount
Standard FittingsBoxed Packing, Fixing Hooks, Gasket, Drain, Overflow, Siphon
Waste fitting3.5 inch drain
Built in hole1140×480 mm
Waste fitting3.5" drain
Base unit80 to 90 cm
DrainerYes
03
BEFORE INSTALLATION
Installation & dimensions
Plan around the appliance
Confirm cabinetry, service connections and final site dimensions before manufacturing or installation. Where brand installation is available, KitchenByPro coordinates through the relevant authorised service centre.
- Measurements are listed in millimetres unless another unit is shown, and are taken from the product's own technical data.
- KitchenByPro does not provide installation for sinks and mixers. The cut out and mounting figures above are what a fitter works to.
- Delivery is managed by the brand. Timings are confirmed after the order is processed.
Inset, undermount or topmount: kitchen sink mounting explainedDelivery, installation and warranty in the UAE
Outside dimensions1160 × 500 mm
Size116 x 50 cm
Dimensions1160 x 500 mm
Width116 cm
Cut out dimensions1140 x 480 mm
Bowl dimensions340 x 400 mm Thickness: 1 mm
Waste fitting3.5 inch drain
Built in hole1140×480 mm
Waste fitting3.5" drain
Base unit80 to 90 cm
04
CUSTOMER FEEDBACK
Reviews
No product reviews have been published yet.
WHY BUY FROM KITCHENBYPRO
Buying from us
Official WarrantyBrand warranty where applicable
Expert Product SupportAsk Pro before or after purchase
Flexible PaymentsOptions shown at checkout
Secure CheckoutProtected payment flow
CM Appliances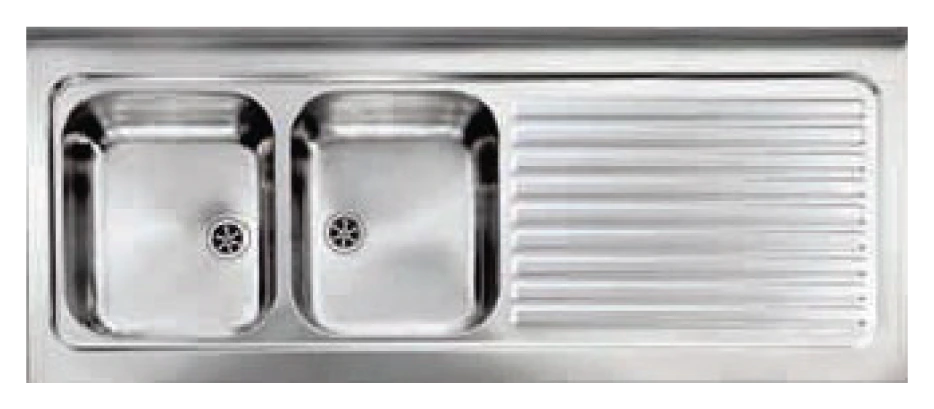 CM Appliances
CM ROSSANA 2 V RIGHT Double Bowl AISI 304 Stainless Steel Top Mount Sink 150 x 60 cm
AED 1,615.7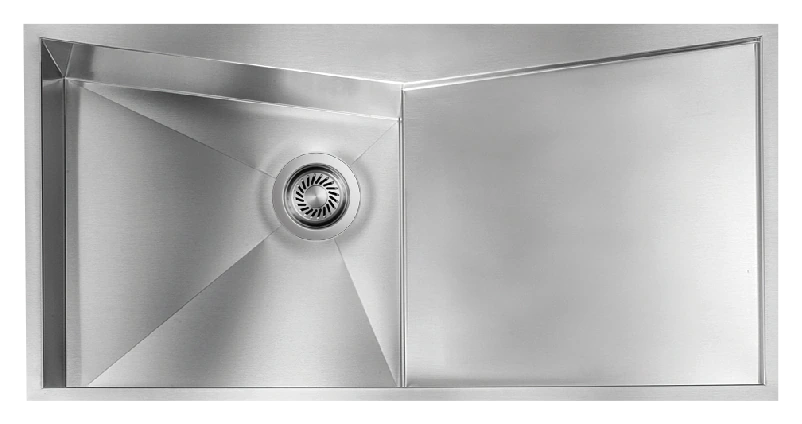 CM Appliances
CM SPACE Single Bowl AISI 304 Stainless Steel Sink 100 x 50 cm
AED 2,824.8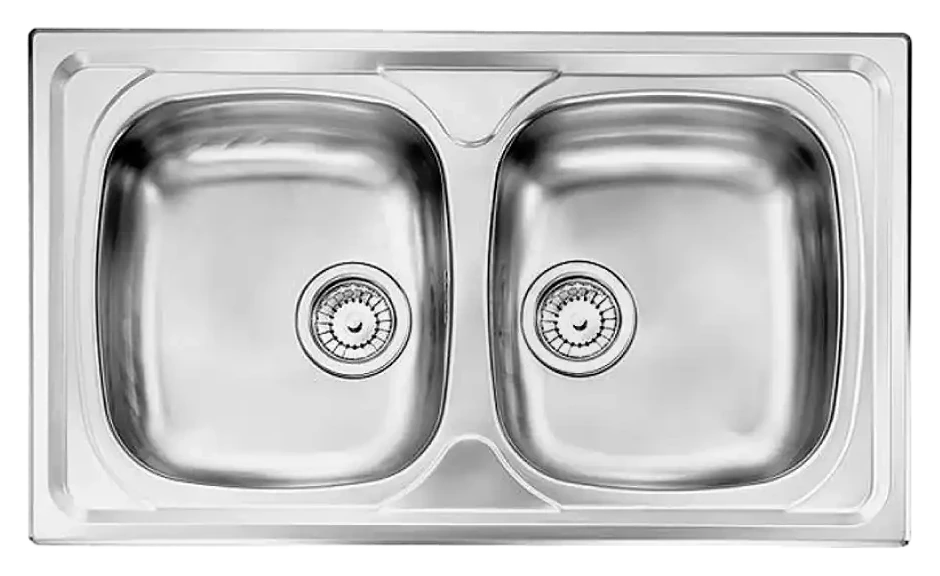 CM Appliances