 CM Appliances
 ⌕
⌕Elba
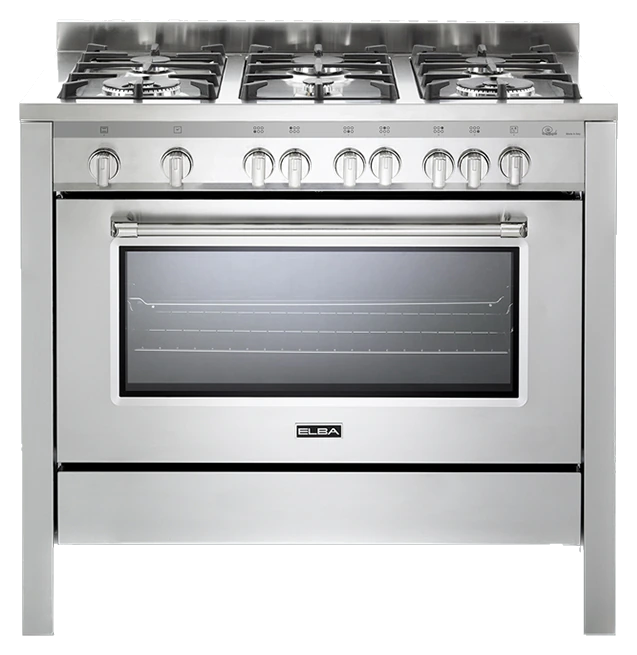
Elba EX 166 FG Freestanding Cooker 100 cm
Model / SKU: EX 166 FG
6,624
● Currently out of stock
Elba IT0022423 is an oven. Product details: Energy class: A+; Technology: gas.
Size100 cm
DimensionsW 1000 x H 900 x D 600 mm
Size100cm
Installation starts from AED 300 + VAT and is quoted by the authorised brand service centre for your site.
Need help?·● Chat on WhatsApp
Delivery · ElbaDubai · Delivery timingDetails
Delivery is handled by Elba. Current timing is checked after the page loads.
Installation · serviceInstallation: from AED 300 + VATDetails
Installation starts from AED 300 + VAT and is quoted by the authorised brand service centre for your site.
P
ASK PRO ABOUT THIS PRODUCT
Need help deciding?
Ask about fit, installation, features, alternatives or how this compares with another appliance.
01
PRODUCT OVERVIEW
At a glance
Elba IT0022423 is an oven. Product details: Energy class: A+; Technology: gas.
Key features
- Hose clamp
- 1 Grill-pan
- Hose holder
Read more features (5 more)Read less
- Energy class A+
- Stainless steel
- Electric fan to
- Rotisserie function
FormatFreestanding
Elba IT0022423 is an oven. Product details: Energy class: A+; Technology: gas.
Functions and performance
Ex 166 fg
W: 1000 mm
H: 900 mm
D: 600 mm
10 0%
The manufacturer cannot be held responsible for possible inaccuracies due to printing or transcription errors in the
The manufacturer reserves the right to make all modifications to its products deemed necessary for manufacturer
commercial reasons at any moment and without prior notice, without jeopardising the essential functional and safety
Le fabricant n’est pas responsable des erreurs éventuelles, dues à des fautes de frappe ou d’impression, susceptibles
Il se réserve le droit, sans porter préjudice aux caractéristiques essentielles, du point de vue fonctionnel et du point
de vue sécurité, d’apporter à ses produits, à tout moment et sans préavis, toutes les modifications éventuellement
are for your own safety and that of others. They will also provide
The appliance guarantee will be void if the appliance is used
After having unpacked the appliance, check to ensure that it is
After use, ensure that the knobs are in the off position.
Clean the oven regularly and do not allow fat or oils to build up in
door to allow steam and hot air to escape before removing the
contact separation in all poles that provide full disconnection under
Failure to comply with this condition will render the guarantee invalid.
200 mm
650 mm
500 mm
450 mm
20 mm
1.2).
+ 8 mm
+ 8
+ 15 mm
4. Move the cooker to the wall and adjust the height of the anti-tilt bracket so that it can
6. Push the cooker against the wall so that the anti-tilt bracket is fully inserted in the slot
= =
The room where the gas appliance is to be installed must have a natural flow of air so that
room which is ventilated as required, as long as it is not a bed room or a danger area (in
In this case, the kitchen door must allow the passage of the air.
There must be a distance of at least 650 mm between the hob of the cooker and any wall
Extractor hoods connected directly to the outside must be provided, to allow the products
window; the fan should have a capacity to circulate air at an hourly rate of 3 to 5 times the
The fan can only be installed if the room has suitable vents to allow air to enter, as described
proper gas pressure regulator which must be adjusted to guarantee the correct
Ensure that the room in which the cooker is to be installed is adequately ventilated, in
The gas supply is connected at the rear of the cooker to the right or left terminal of the
1. If not already fitted, fit the Natural gas hose holder on the inlet pipe, making sure that
15 mm).
6 mm).
the hose is replaced at the printed due date or if it shows signs of wear or damage, and
sealing washer/s is/are the part/s which guarantee/s a good seal in the gas connection.
the flexible pipe can easily be inspected along its entire length to check its condition; if
Freestanding Cooker 100 cm Gas, Catalytic Cleaning Panel Stainlesss steel cooktop 18/10 6 Gas burners + 1 triple ring Enamelled cast-iron pan-supports Automatic ignition Safety devices on all burners Cast-iron wok stand Easy to clean enamel
FEATURES Thermostatic gas oven 30 M-bar regulator Forced air convection mode Automatic ignition Safety devices on oven/grill Rotisserie function Double glass door + light
- Oven features
- 30 M-bar regulator
- Forced air convection mode
- Automatic ignition
- Safety devices on oven/grill
- Double glass door + light
- 1 Tray
- 1 Shelf
- Cooktop features
- Stainlesss steel cooktop 18/10
- 6 Gas burners of which 2 double ring wok burners
- 1 triple ring
- Enamelled cast-iron pan-supports
- Safety devices on all burners
- Cast-iron wok stand
- Easy to clean enamel
- Head Office / Showroom Dubai
- PO Box 37959, Dubai
- Showroom Abu Dhabi
- PO Box 28239, Abu Dhabi
- Service Center
- Uae 600 555 602
- Mvpappliances.com
- Dual fuel cooker
- Cuisiniere mixte
- Made in Italy
- Elba quality
- present booklet.
- characteristics of the appliances.
- de se trouver dans cette notice.
- nécessaires pour faire face à des exigences de fabrication ou de commercialisation.
- Dear Customer
- Thank you for having purchased and given your preference to
- our product.
- The safety precautions and recommendations reported below
- a means by which to make full use of the features offered by your
- appliance.
- Please preserve this booklet carefully. It may be useful in future
- either to yourself or to others in the event that doubts should
- arise relating to its operation.
- This appliance must be used only for the task it has
- explicitly been designed for, that is for cooking foodstuffs.
- Any other form of usage is to be considered as inappropriate
- The manufacturer declines all responsibility in the event
- of damage caused by improper, incorrect or illogical use of
- Important safety precautions and recommendations
- solely for the cooking of domestic (household) food and is
- not suitable for any non domestic application and therefore
- should not be used in a commercial environment.
- within a non domestic environment i.e. a semi commercial
- commercial or communal environment.
- Read the instructions carefully before installing and using
- This appliance has been designed and manufactured in
- compliance with the applicable standards for the household
- cooking products, including those for surface temperatures.
- Some people with sensitive skin may have a more pronounced
- temperature perception with some components although these
- parts are within the limits allowed by the norms.
- The complete safety of the appliance also depends on the correct
- use, we therefore recommend to always pay a extreme attention
- while using the product, especially in the presence of children.
- not damaged and that the oven door closes correctly.
- In case of doubt, do not use it and consult your supplier or a
- professionally qualified technician.
- Packing elements (i.e. plastic bags, polystyrene foam, nails
- packing straps, etc.) should not be left around within easy reach
- of children, as these may cause serious injuries.
- Some appliances are supplied with a protective film on steel and
- aluminium parts. This film must be removed before using the
- recommended when handling or cleaning this appliance.
- Do not attempt to modify the technical characteristics of
- the appliance as this may become dangerous to use. The
- manufacturer declines all responsibility for any inconvenience
- resulting from the inobservance of this condition.
- ventilated room in compliance with the applicable regulations.
- Do not operate your appliance by means of an external timer or
- separate remote-control system.
- Do not carry out cleaning or maintenance operations on the
- appliance without having previously disconnected it from the
- electric power supply.
- replacing the oven lamp to avoid the possibility of electric shock.
- Do not use a steam cleaner because the moisture can get into
- the appliance therefore making it unsafe.
- Do not touch the appliance with wet or damp hands (or feet).
- Do not use the appliance whilst in bare feet.
- If you should decide not to use this appliance any longer (or
- decide to substitute another model), before disposing of it, it
- is recommended that it be made inoperative in an appropriate
- manner in accordance to health and environmental protection
- regulations, ensuring in particular that all potentially hazardous
- parts be made harmless, especially in relation to children who
- could play with unused appliances.
- The various components of the appliance are recyclable. Dispose
- of them in accordance with the regulations in force in your country.
- If the appliance is to be scrapped, remove the power cord.
- Children less than 8 years of age shall be kept away unless
- continuously supervised.
- This appliance can be used by children aged from 8 years and
- above and persons with reduced physical, sensory or mental
- capabilities or lack of experience and knowledge if they have
- been given supervision or instruction concerning use of the
- appliance in a safe way and understand the hazards involved.
- Children shall not play with the appliance. Cleaning and user
- maintenance shall not be made by children without supervision.
- The manufacturer declines all liability for injury to persons or
- damage to property caused by incorrect or improper use of the
- become hot; they remain hot for some time after use.
- Care should be taken to avoid touching heating elements (on
- the hob and inside the oven).
- The door is hot, use the handle.
- To avoid burns and scalds, young children should be kept
- away.
- Models with warming drawer only: care should be taken to
- avoid touching heating element inside the drawer.
- Make sure that electrical cables connecting other appliances in
- the proximity of the cooker cannot come into contact with the hob
- or become entrapped in the oven door.
- dangerous and may result in fire. NEVER try to extinguish a fire
- with water, but switch off the appliance and then cover flame e.g.
- with a lid or a fire blanket.
- surfaces.
- objects etc., disconnect the appliance from the electrical power
- supply to avoid the possibility of electric shock and call Customer
- Service.
- safety requirements laid down for this type of product category.
- However special care should be taken around the rear or the
- underneath of the appliance as these areas are not designed or
- intended to be touched and may contain sharp or rough edges
- instructions
- Furnish the interior of the oven as described in the chapter
- Cleaning and maintenance .
- Switch on the empty oven on max to eliminate grease from the
- heating elements.
- Disconnect the appliance from the electrical power supply, let
- the oven cool down and clean the interior of the oven with a
- cloth soaked in water and neutral detergent; then dry carefully.
- scrapers to clean the oven door glass since they can scratch the
- Do not line the oven walls or base with aluminium foil. Do not place
- baking trays or the drip tray on the base of the oven chamber.
- Do not cover the hob with aluminium foils.
- FIRE RISK! Do not store flammable material in the oven or in the
- storage compartment.
- Always use oven gloves when removing the shelves and food
- trays from the oven whilst hot.
- Do not hang towels, dishcloths or other items on the appliance or
- its handle as this could be a fire hazard.
- the oven base or tray. Remove spillages as soon as they occur.
- Do not stand on the cooker or on the open oven door.
- Always stand back from the appliance when opening the oven
- food.
- a time as possible before and after cooking. This is to avoid
- contamination by organisms which may cause food poisoning.
- Take particular care during warmer weather.
- term cooking process has to be supervised continuously.
- The appliance must not be installed behind a decorative door in
- order to avoid overheating.
- The oven accessories (e.g. oven wire rack) must be fitted
- correctly as indicated at page 49.
- If the power supply cable is damaged, it must be replaced only
- by an authorized service agent in order to avoid a hazard.
- If the appliance is not fitted with a supply cord and a plug, or with
- other means for disconnection from the supply mains having a
- overvoltage category III conditions, means for disconnection
- must be incorporated in the fixed wiring in accordance with the
- wiring rules.
- during use.
- Care should be taken to avoid touching heating elements.
- of the cooking appliance or indicated by the manufacturer of the
- appliance in the instructions for use as suitable or hob guards
- incorporated in the appliance. The use of inappropriate guards
- Advice for the
- installer
- Important
- The appliance is designed and approved for domestic use only and should not be
- installed in a commercial, semi commercial or communal environment.
- Your product will not be guaranteed if installed in any of the above environments
- and could affect any third party or public liability insurances you may have.
- This appliance is to be installed, regulated and adapted to function only by an authorized
- person in compliance with the current local regulations in force and in observation of
- Incorrect installation, for which the manufacturer accepts no responsibility, may cause
- personal injury or damage.
- This appliance shall only be serviced by authorized personnel.
- Always disconnect the appliance from mains power supply before carrying out any
- maintenance operations or repairs.
- handling or cleaning of this appliance.
- The walls of the units must not be higher than work top and must be capable of
- resisting temperatures of 70°C above room temperature.
- We would point out that the adhesive which bonds the plastic laminate to the
- furniture must withstand temperatures not less than 150°C to avoid delamination.
- Do not install the appliance near inflammable materials (eg. curtains).
- Some appliances are supplied with a protective film on steel and aluminium parts.
- This film must be removed before using the cooker.
- Warning!
- When correctly installed, your product meets all safety requirements laid down for
- this type of product category. However special care should be taken around the rear
- or the underneath of the appliance as these areas are not designed or intended to be
- touched and may contain sharp or rough edges, that may cause injury.
- The installation conditions, concerning protection against overheating of the surfaces
- adjacent to the cooker, must conform to figs. 1.1 A or 1.1b.
- The appliance must be kept no less than 200 mm away from any side wall which exceeds
- the height of the hob surface (figs. 1.1 A or 1.1b).
- The veneered syntetical material and the glue used must be resistant to a temperature of
- 150°C in order to avoid ungluing or
- deformations.
- Curtains must not be fitted immediatly
- behind appliance or within 500 mm of
- If the cooker is located on a pedestal
- it is necessary to provide safety
- measures to prevent falling out.
- The appliance must be housed in
- heat resistant units.
- The walls of the units must not be
- higher than work top and must be
- capable of resisting temperatures
- of 70°C above room temperature.
- Do not instal the appliance
- near inflammable materials (eg.
- curtains).
- Class 1
- (fig. 1.1 A)
- easily inspected or using rigid or
- flexible metal pipe.
- A space of at least 2 cm must be left
- between the cooker and any adjacent
- furniture, which must not exceed the
- Class 2
- Subclass 1
- (fig. 1.1b)
- Fig. 1.1b
- Fig. 1.1 A
- Some models only
- Backguard (supplied with
- Some models only)
- Before installing the cooker, assemble the
- backguard C (fig. 1.5).
- The backguard C can be found
- packed at the rear of the cooker.
- Before assembling remove any
- protective film/adhesive tape.
- Remove the two spacers A and the
- screw B from the rear of the cooktop.
- Assemble the backguard as shown
- in figure 1.5 and fix it by screwing the
- central screw B and the spacers A .
- Fig. 1.5
- Levelling the cooker
- The cooker is equipped with 4 LEVELLING
- FEET and may be levelled by screwing or
- unscrewing the feet with a spanner (fig.
- The adjustable feet are already fitted to the
- cooker but the locking nuts which can be
- found in the oven packaging require to be
- fitted as detailed on figures 1.3 to 1.4.
- It is important to observe the prescriptions
- of figures 1.3 to 1.4.
- Fig. 1.2
- Fig. 1.3
- Fig. 1.4
- Moving the cooker
- out this manoeuvre to prevent damage to the adjustable feet (fig. 1.6).
- Warning
- position (fig. 1.7).
- When moving cooker to its final position
- DO NOT DRAG (fig. 1.8).
- Lift feet clear of floor (fig. 1.6).
- Fig. 1.8Fig. 1.7
- Fig. 1.6
- Anti-tilt bracket
- bracket to the rear of the appliance and securely fixing it to the wall.
- To fit the anti-tilt bracket
- 1. After you have located where the cooker is to be positioned, mark on the wall the
- place where the 2 screws of the anti-tilt bracket have to be fitted. Please follow the
- indications given in fig. 1.9.
- 2. Drill two 8 mm diameter holes in the wall and insert the plastic plugs supplied.
- Important! Before drilling the holes, check that you will not damage any pipes
- 3. Loosely attach the anti-tilt bracket with the 2 screws supplied.
- engage in the slot on the cooker’s back, as shown in fig. 1.9.
- 5. Tighten the screws attaching the anti-tilt bracket.
- Attention!
- When sliding the cooker into place pay special attention not to trap the power
- supply cable in the stability bracket.
- Pay special attention to the gas connection hose.
- Fig. 1.9
- Extractor hood
- combustion
- Air vent
- extract products
- Fig. 1.11Fig. 1.10
- H min 650 mm
- Ventilation requirements
- The appliance must be installed in compliance with applicable local regulations
- concerning ventilation and the evacuation of exhaust gases.
- Intensive and prolonged use may require extra ventilation, e.g. opening a window
- or more efficient ventilation increasing the mechanical suction power if this is fitted.
- Choosing suitable surroundings
- the gas can burn (in compliance with applicable local regulations).
- The flow of air must come directly from one or more openings made in the outside walls
- with a free area of at least 100 cm2 (or refer to applicable local regulations).
- The openings should be near the floor and preferably on the side opposite the exhaust for
- combustion products and must be made so that they cannot be blocked from either the
- inside or the outside.
- When these openings cannot be made, the necessary air can come from an adjacent
- compliance with applicable local regulations).
- cupboard or extractor hood positioned immediately above (see fig. 1.10).
- Discharging products of combustion
- of combustion of the gas appliance to be discharged (fig. 1.10).
- If this is not possible, an electric fan may be used, attached to the external wall or the
- under the heading Choosing suitable surroundings .
- Important !
- This appliance must be installed and serviced only by a suitably qualified
- registered installer. The installer shall refer to the local standards in force.
- Failure to install the appliance correctly could invalidate any manufacturer’s
- Before installation, make sure that the local distribution conditions (gas type and
- adjustment conditions are given on the plate or the label.
- If the gas pressure (for which the appliance is to be used) is variable or if it is
- not within the values indicated on the rating plate, it is mandatory to install a
- operating pressure to the appliance (as per rating plate).
- The regulator must be installed, adjusted and tested by a qualified technician.
- be extremely dangerous and may result in serious injury to the user. Damage to
- the appliance could occur if not observing this condition.
- The manufacturer declines every responsibility for any inconvenience resulting
- from the inobservance of this condition.
- This appliance is supplied for use on LPG (check the gas regulation label attached on the
- appliance).
- This appliance is supplied for use on Natural gas or LPG (check the gas regulation label
- attached on the appliance).
- cannot be used on any other gas (LPG) without modification. The appliances are
- manufactured for conversion to LPG.
- be used on any other gas (Natural gas) without modification. The appliances are
- manufactured for conversion to Natural gas.
- If the Natural gas/LPG conversion kit is not supplied with the appliance this kit can be
- purchased by contacting the After-Sales Service.
- Operating pressure: 2.8 kPa.
- This appliance is manufactured for conversion to G20 (NATURAL GAS) if required and is
- supplied with a conversion kit.
- This appliance must only be connected to NATURAL GAS after a NATURAL GAS
- conversion kit has been fitted.
- Connecting the appliance to the gas supply
- The gas connection must be carried out by an authorised person according to the relevant
- standards.
- compliance with applicable regulations.
- Connect the cooker to the gas mains utilizing rigid or flexible pipes.
- The unused inlet pipe must be closed off with the plug and sealing washer supplied
- (fig. 2.1b).
- Fig. 2.1 A
- Fig. 2.1b
- Right or left
- Manifold male
- pipe fitting
- Sealing
- washer (#)
- 1/2 G cylindrical
- (ISO 228 to 1) male
- (ISO 228 to 1) female
- (#) Already fitted on the right or
- left inlet pipe
- Fitting the plug on the unused
- terminal of the gas inlet pipe
- Possible gas connections
- Imporant!
- A rubber hose connection shall only be made if permitted by the applicable local
- regulations.
- The gas connection is made up of
- the terminal fitting of the inlet pipe (right-hand or left-hand)
- sealing washer
- the appropriate hose holder (for Natural gas or LPG). If not supplied with the appliance
- it can be purchased by contacting the After-Sales Service.
- Connecting the cooker to Natural gas
- you place the sealing washer between them (as shown in fig. 2.2).
- 2. Connect the cooker to the gas supply using a suitable rubber hose (internal diameter
- The hose must comply with the applicable local regulations and be of the correct
- construction for the type of gas being used.
- 3. Make sure that the hose is tightly and securely fitted at both ends.
- 4. Use a standard hose clamp (not supplied) to fasten the hose.
- Connecting the cooker to LPG
- 1. If not already fitted, fit the LPG hose holder on the inlet pipe, making sure that you
- place the sealing washer between them (as shown in fig. 2.2).
- 5. Install a gas pressure regulator.
- Important!
- To comply with applicable local regulations, a gas pressure regulator (conforming
- to the local regulations in force) must be installed when connecting the cooker to an
- LPG cylinder.
- When connecting the cooker to the gas supply with a rubber hose, make sure that
- the hose is as short as possible, without twists or kinks.
- the hose is not longer than 750 mm (or refer to applicable local regulations) and does
- not come into contact with sharp edges, corners or moving parts. Use a single rubber
- the hose is not under tension, twisted, kinked, or too tightly bent, neither while the
- appliance is in use nor while it is being connected or disconnected.
- the hose does not come into contact with any part of the cooker with a surface
- temperature of 70°C or above (or refer to applicable local regulations).
- the hose is not subject to excessive heat by direct exposure to flue products or by
- contact with hot surfaces.
- the hose can easily be inspected along its entire length to check its condition.
- replaced regardless of its condition after a maximum of three years.
- you inform the customer that the gas cylinder valve or the gas supply valve immediately
- by the cooker should be closed when the cooker is not in use.
- you inform the customer that the hose should not be subjected to corrosion by acidic
- cleaning agents.
- After connecting the cooker to the gas supply, make sure that you
- check that the connections are correctly sealed using a soapy solution, but never a
- naked flame.
- check whether the injectors are correct for the type of gas being used. If not, follow the
- instructions under GAS MAINTENANCE .
- replace the sealing washer/s on the slightest sign of deformation or imperfection. The
- use two spanners when fitting the hose holder (fig. 2.2).
- with the product in a separate kit; if not supplied with the appliance
- they can be purchased by contacting the After-Sales Service.
- Manifold
- male
- Natural gas
- (not supplied)
- Lpg ng
- Rubber hose (not supplied)
- (internal diameter 6 mm)
- (internal diameter 15 mm)
- Fig. 2.2
- (#) If not already fitted on the inlet pipe
- it is supplied with the appliance in a
- separate kit
- sealing washer.
- If fitted, remove the hose holder from the terminal fitting of the inlet pipe.
- When connecting the cooker to the gas supply with rigid pipes or a flexible pipe
- make sure that
- you use rigid pipes or a flexible pipe complying with applicable local regulations. The
- flexible pipe shall be of the correct construction for the type of gas being used.
- if compression fittings are used, you tighten them firmly using two spanners (fig. 2.3).
- the connection with rigid metal pipes does not cause stress or pressure to the gas
- piping.
- the flexible pipe is not under tension, twisted, kinked or too tightly bent, neither while
- the appliance is in use nor while it is being connected or disconnected.
- the flexiple pipe does not exceed 2000 mm in length (or refer to applicable local
- regulations) and does not come into contact with sharp edges, corners or moving
- parts. Use a single flexible pipe only; never connect the cooker with more than one
- flexible pipe.
- it has an expiry date, it should be replaced before that date.
- if using a flexible pipe which is not entirely made of metal, make sure that it does not
- come into contact with any part of the cooker with a surface temperature of 70°C or
- above (or refer to applicable local regulations).
- the rigid or flexible pipe is not subject to excessive heat by direct exposure to flue
- products or by contact with hot surfaces.
- the rigid or flexible pipe is replaced if it shows signs of wear or damage.
- a gas pressure regulator, in compliance with the applicable local regulations, is
- installed when connecting to an LPG cylinder.
- you inform the customer that the cylinder valve or the supply valve immediately by the
- appliance should be closed when the cooker is not in use.
- you inform the customer that the rigid or flexible pipe should not be subjected to
- corrosion by acidic cleaning agents.
- use two spanners when connecting the rigid or flexible pipe (fig. 2.3).
- ACCESSORIES 1 Tray, 1 Shelf, 1 Grill-pan
Dimensions and finish
- External dimensions
- Finish
- surface, which may result in shattering of the glass.
- height of the cooktop.
- door handle when raising to the upright
- DIMENSIONS External dimensions W 1000 mm x H 900 mm x D 600 mm
Electrical and installation
Total electric absorption: 60 W
Total gas absorption: 20500 W
- Gas, Catalytic Cleaning Panel
- Gas connection made using rubber
- hose which must be visible and
- Gas connection made using rigid or
- total volume of the kitchen (fig. 1.11).
- Gas installation requirements
- pressure) and the adjustment of this appliance are compatible. The appliance
- gas inlet pipe (fig. 2.1 A). The connection pipe must not cross the rear of the appliance.
- inlet pipe
- Plug (#)
- Plug
- Gas connection with a rubber hose
- hose only; never connect the appliance with more than one rubber hose.
- Gas connection with rubber hose holders
- Gas connection with rigid pipes or a flexible pipe
- Energy class A+ 60 W Total electric absorption 20500 W Total gas absorption
02
TECHNICAL DETAILS
Specifications
SKU / ModelEX 166 FG
BrandElba
Outside dimensions (per Elba product data)100cm
Size100 cm
DimensionsW 1000 x H 900 x D 600 mm
DIMENSIONS External dimensions W1000 mm x H 900 mm x D 600 mm
Total gas absorption20500 w
03
BEFORE INSTALLATION
Installation & dimensions
Plan around the appliance
Confirm cabinetry, service connections and final site dimensions before manufacturing or installation. Where brand installation is available, KitchenByPro coordinates through the relevant authorised service centre.
- Measurements are listed in millimetres unless another unit is shown, and are taken from the product's own technical data.
- Installation is available through the brand's authorised service centre at an additional charge. The final amount is confirmed by the service centre for your site.
- Delivery is managed by the brand. Timings are confirmed after the order is processed.
Outside dimensions100cm
Size100 cm
DimensionsW 1000 x H 900 x D 600 mm
DIMENSIONS External dimensions W1000 mm x H 900 mm x D 600 mm
Total gas absorption20500 w
04
CUSTOMER FEEDBACK
Reviews
No product reviews have been published yet.
WHY BUY FROM KITCHENBYPRO
Buying from us
Official WarrantyBrand warranty where applicable
Expert Product SupportAsk Pro before or after purchase
Flexible PaymentsOptions shown at checkout
Secure CheckoutProtected payment flow
CM Appliances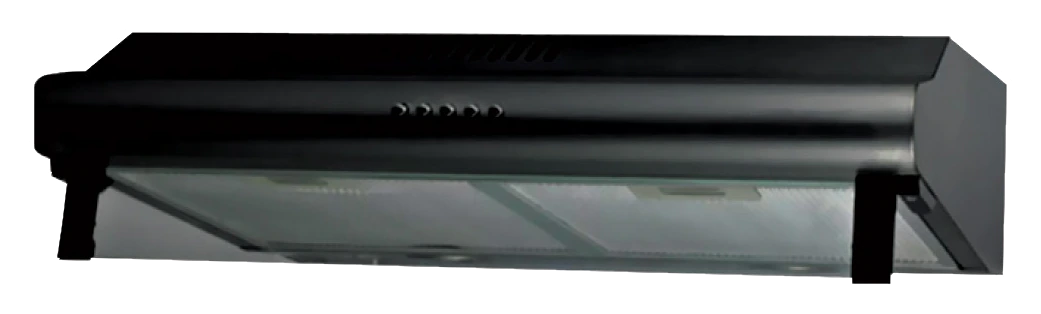 CM Appliances
CM C3 PUSH BUTTON – BLACK Under-Cabinet Hood 90 cm
AED 401.25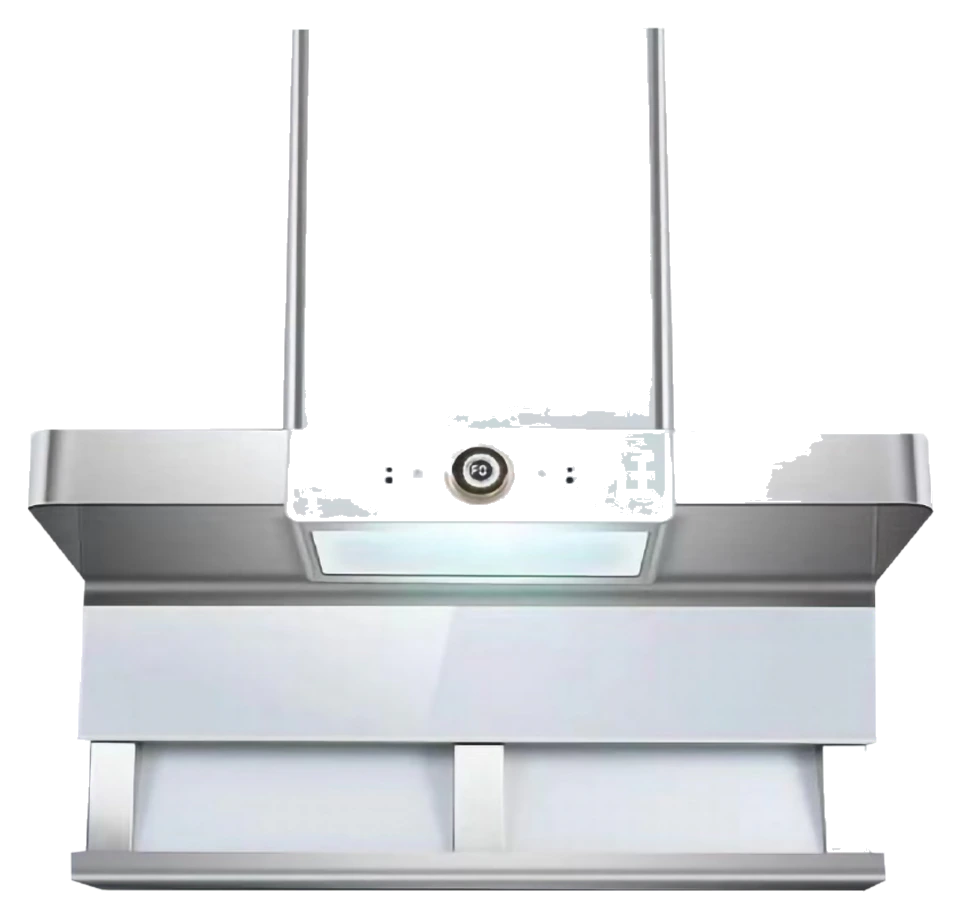 CM Appliances
CM AMBER BIANCO White Hood
AED 3,424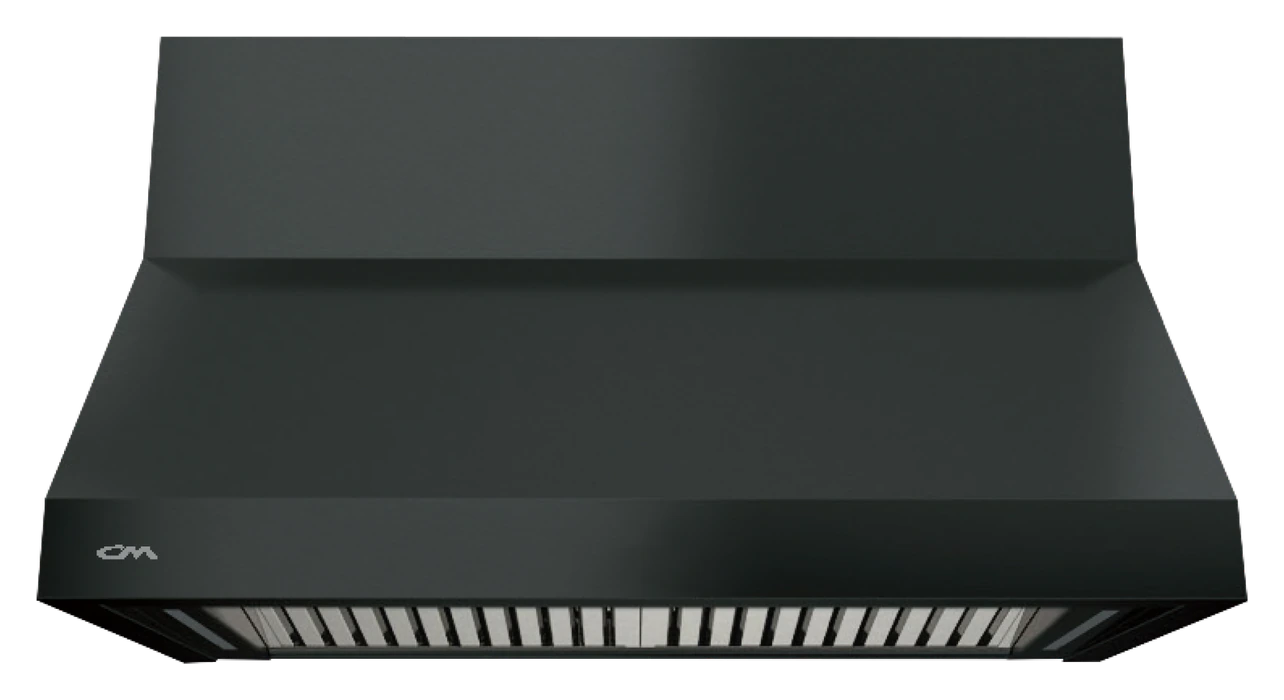 CM Appliances