 CM Appliances
 ⌕
⌕Elba
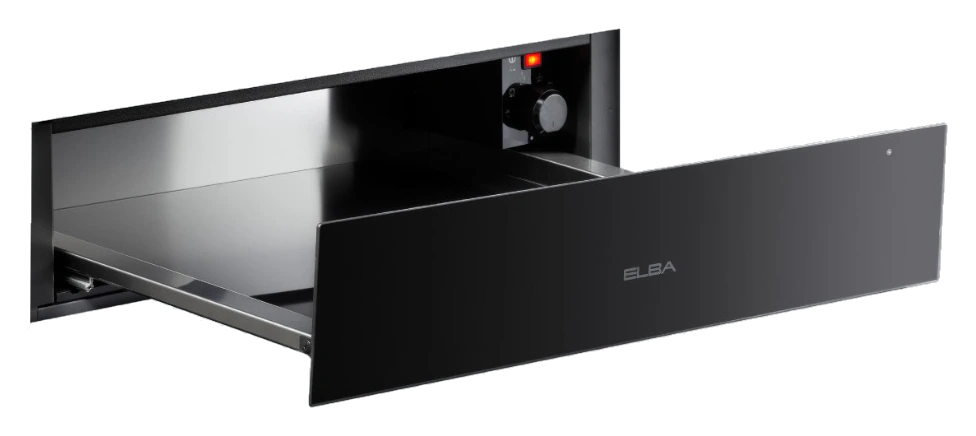
Elba EL 14B DW Built-In Plate Warmer 60 cm
Model / SKU: EL 14B DW
2,426
● In stock
Elba IT0022515 is an appliance. Product details: Capacity: 24 L; Finish: Black glass.
Size60 cm
DimensionsW 595 x H 140 x D 595 mm
Net liters capacity24 L
Delivery · ElbaDubai · Delivery timingDetails
Delivery is handled by Elba. Current timing is checked after the page loads.
Installation · serviceInstallation: from AED 300 + VATDetails
Installation starts from AED 300 + VAT and is quoted by the authorised brand service centre for your site.
P
ASK PRO ABOUT THIS PRODUCT
Need help deciding?
Ask about fit, installation, features, alternatives or how this compares with another appliance.
01
PRODUCT OVERVIEW
At a glance
Elba IT0022515 is an appliance. Product details: Capacity: 24 L; Finish: Black glass.
Key features
- Black glass
- Knob control
- Control knob
Read more features (7 more)Read less
- Warming drawer
- electric power supply.
- Black glass front panel
- Close the drawer gently.
FormatBuilt in
Drawer typePlate warmer
Temperature range30° to 80°C
Confirm the opening, the service connections and the clearance before ordering. Delivery is managed by Elba. Installation is handled by the brand's authorised service centre in the UAE.
Elba IT0022515 is an appliance. Product details: Capacity: 24 L; Finish: Black glass.
Functions and performance
El 14b dw
W 595 mm x H 139 mm x D 535 mm
W 560 mm x H 140 mm x D 550 mm
10 0%
will also provide a means by which to make full use of the
This appliance has been designed to be used only for cooking. Any other use (such as
The appliance guarantee will be void if the appliance is used
After having unpacked the appliance, check to ensure that it is
After use, ensure that the knobs/controls are in the off position.
Clean the warming drawer regularly and do not allow fat or oils
drawer door to allow steam and hot air to escape before removing
contact separation in all poles that provide full disconnection under
Failure to comply with this condition will render the guarantee invalid.
556 to 564
A a
If the food-warmer drawer is not aligned with the appliance with which it is installed, proceed
220 to 240 V ac 3 x 0.75 mm2 (*)
Place the meat in the pre-heated tray and cover it with a heat resistant lid or cling film.
Built in Warming Drawer 14 cm Full black glass Push-push opening system Sliding telescopic rails Easy to clean inner removable temperate glass surface 6 place setting, 110 mm usable height 24 L capacity
Temperature range 30° to 80°C knob control Special functions leaving, slow cooking, pre-heating, keep warming, yogurt fermentation Illuminated switch on-off pilot 220 to 240 V / 50 to 60 Hz (cables without plug)
- Built-In Dishwarmer 60 cm
- Telescopic Drawer, Black Line Collection
- Push-pull opening system
- Telescopic drawer with anti-sliding material
- 6 Place setting, 110 mm usable height
- Illuminated switch on-off pilot
- Temperature range: 30° to 80°C
- Leavening
- Slow cooking
- Pre-heating
- Keep warming
- Fermentation
- Head Office / Showroom Dubai
- PO Box 37959, Dubai
- Showroom Abu Dhabi
- PO Box 28239, Abu Dhabi
- Service Center
- Uae 600 555 602
- Mvpappliances.com
- Made in Italy
- Elba quality
- Dear Customer
- Thank you for having purchased and given your preference
- The safety precautions and recommendations reported
- below are for your own safety and that of others. They
- features offered by your appliance.
- Please preserve this booklet carefully. It may be useful
- in future, either to yourself or to others in the event that
- doubts should arise relating to its operation.
- This appliance must be used only for the task it
- has explicitly been designed for, that is for cooking
- foodstuffs. Any other form of usage is to be considered
- as inappropriate and therefore dangerous.
- The manufacturer declines all responsibility in the
- event of damage caused by improper, incorrect or
- illogical use of the appliance.
- Declaration of ce conformity
- heating a room) is improper and dangerous.
- This appliance has been designed, constructed, and marketed in compliance with
- Important safety precautions and recommendations
- solely for household applications and is not suitable for any
- non domestic application and therefore should not be used
- within a non domestic environment i.e. a semi commercial
- commercial or communal environment.
- Read the instructions carefully before installing and using
- This appliance has been designed and manufactured in
- compliance with the applicable standards for the household
- cooking products and it fulfills all the safety requirements shown
- in this manual, including those for surface temperatures.
- Some people with sensitive skin may have a more pronounced
- temperature perception with some components although these
- parts are within the limits allowed by the norms.
- The complete safety of the appliance also depends on the correct
- use, we therefore recommend to always pay a extreme attention
- while using the product, especially in the presence of children.
- not damaged and that the warming drawer closes correctly.
- In case of doubt, do not use it and consult your supplier or a
- professionally qualified technician.
- Packing elements (i.e. plastic bags, polystyrene foam, nails
- packing straps, etc.) should not be left around within easy reach
- of children, as these may cause serious injuries.
- Some appliances are supplied with a protective film on steel and
- aluminium parts. This film must be removed before using the
- appliance.
- recommended when handling or cleaning this appliance.
- Do not attempt to modify the technical characteristics of
- the appliance as this may become dangerous to use. The
- manufacturer declines all responsibility for any inconvenience
- resulting from the inobservance of this condition.
- Do not operate your appliance by means of an external timer or
- separate remote-control system.
- Do not carry out cleaning or maintenance operations on the
- appliance without having previously disconnected it from the
- Do not use a steam cleaner because the moisture can get into
- the appliance therefore making it unsafe.
- Do not cover the interior of the warming drawer with aluminium
- foils.
- Do not touch the appliance with wet or damp hands (or feet).
- Do not use the appliance whilst in bare feet.
- If you should decide not to use this appliance any longer (or
- decide to substitute another model), before disposing of it, it
- is recommended that it be made inoperative in an appropriate
- manner in accordance to health and environmental protection
- regulations, ensuring in particular that all potentially hazardous
- parts be made harmless, especially in relation to children who
- could play with unused appliances.
- The various components of the appliance are recyclable. Dispose
- of them in accordance with the regulations in force in your country.
- If the appliance is to be scrapped, remove the power cord.
- Children less than 8 years of age shall be kept away unless
- continuously supervised.
- This appliance can be used by children aged from 8 years and
- above and persons with reduced physical, sensory or mental
- capabilities or lack of experience and knowledge if they have
- been given supervision or instruction concerning use of the
- appliance in a safe way and understand the hazards involved.
- Children shall not play with the appliance. Cleaning and user
- maintenance shall not be made by children without supervision.
- The manufacturer declines all liability for injury to persons or
- damage to property caused by incorrect or improper use of the
- become hot; they remain hot for some time after use.
- Care should be taken to avoid touching heating elements inside
- To avoid burns and scalds, young children should be kept away.
- Make sure that electrical cables connecting other appliances in
- the proximity of the warming drawer cannot become entrapped in
- safety requirements laid down for this type of product category.
- However special care should be taken around the rear or the
- underneath of the appliance as these areas are not designed or
- intended to be touched and may contain sharp or rough edges
- drawer.
- these instructions
- Furnish the interior of the warming drawer as described in the
- chapter CLEANING AND MAINTENANCE .
- Switch on the empty warming drawer on max to eliminate
- grease from the heating elements.
- Disconnect the appliance from the electrical power supply
- let the warming drawer cool down and clean the interior of
- the warming drawer with a cloth soaked in water and neutral
- detergent; then dry carefully.
- scrapers to clean the warming drawer front panel glass and inner
- result in shattering of the glass.
- FIRE RISK! Do not store flammable material in the warming
- Always use oven gloves when removing the crockery and food
- trays from the warming drawer whilst hot.
- to build up in the warming drawer base or tray. Remove spillages
- as soon as they occur.
- Do not stand on the open warming drawer.
- Be careful not to hit the warming drawer when it is in the open
- position.
- Always stand back from the appliance when opening the warming
- a time as possible before and after cooking. This is to avoid
- contamination by organisms which may cause food poisoning.
- Take particular care during warmer weather.
- The appliance must not be installed behind a decorative door in
- order to avoid overheating.
- to place the food directly on its surface. When cooking, always
- place the food in special containers or use specific materials
- suitable for the food contact.
- If the power supply cable is damaged, it must be replaced only
- by an authorized service agent in order to avoid a hazard.
- If the appliance is not fitted with a supply cord and a plug, or with
- other means for disconnection from the supply mains having a
- overvoltage category III conditions, means for disconnection
- must be incorporated in the fixed wiring in accordance with the
- wiring rules.
- during use.
- Care should be taken to avoid touching heating elements.
- Use of the appliance, energy saving tips
- Check the warming drawer always closes properly. During use, open the drawer only
- when strictly necessary to avoid heat losses.
- Avoid keeping the warming drawer on without something in it.
- Turn off the warming drawer 5 to 10 minutes before the end of the theoretical warming
- time to recuperate the stored heat.
- We recommend using oven proof dishes and adjusting the temperature during the use
- if necessary.
- Important information for correct disposal of the product in
- At the end of its working life, the product must not be disposed of as
- urban waste. It must be taken to a special local authority differentiated
- waste collection centre or to a dealer providing this service.
- Disposing of a household appliance separately avoids possible negative
- consequences for the environment and health deriving from inappropriate
- disposal and enables the constituent materials to be recovered to obtain
- significant savings in energy and resources. As a reminder of the need
- to dispose of household appliances separately, the product is marked
- with a crossed-out wheeled dustbin.
- Advice for
- Important
- The appliance is designed and approved for domestic use only and should not be
- installed in a commercial, semi commercial or communal environment.
- Your product will not be guaranteed if installed in any of the above environments
- and could affect any third party or public liability insurances you may have.
- This appliance is to be installed only by an authorised person according to the current
- local regulations and in observation of the manufacturer’s instructions.
- Incorrect installation, for which the manufacturer accepts no responsibility, may cause
- personal injury of damage.
- This appliance shall only be serviced by authorized personnel.
- Always disconnect the appliance from mains power supply before carrying out any
- maintenance operations or repairs.
- Some appliances are supplied with a protective film on steel and aluminium parts.
- This film must be removed before using the cooker.
- handling or installing this appliance.
- The appliance must be housed in heat resistant units.
- The walls of the units must be capable of resisting temperatures of 70 °C above
- room temperature.
- We would point out that the adhesive which bonds the plastic laminate to the
- furniture must withstand temperatures not less than 150 °C to avoid delamination.
- Do not install the appliance near inflammable materials (e.g. curtains).
- Warning
- When correctly installed, your product meets all safety requirements laid down for
- this type of product category.
- However special care should be taken around the underneath of the appliance as
- this area is not designed or intended to be touched and may contain sharp or rough
- edges, that may cause injury.
- 550 min
- Fig. 1.1
- Fig. 1.2
- Fig. 1.3
- The drawer can be fitted in standard units, width and depth 60 cm.
- On the lower side, the drawer must lay on supports standing the drawer weight.
- a fixed internal shelf able to support the weight of both the drawer and the second
- appliance, which can be placed directly on the drawer, without any need for a
- separating shelf (fig. 1.2).
- The two appliances should be connected to the electrical supply with independent
- connections.
- Remember the housing should not be free standing but be secured to the wall and/or
- adjacent fittings.
- Do not seal the drawer into the cabinetry with silicone or glue; this makes future
- servicing difficult. The manufacturer will not cover the costs of removing the
- drawer, or of damage caused by this removal.
- The walls surrounding the appliance must be made of heat-resistant material.
- Fastening the warming drawer
- Before you install the drawer, make sure that the work surface is square and level, and no
- structural members interfere with space requirements previously indicated.
- To fasten the warming drawer, proceed as follows
- place the warming drawer on the shelf and slide it towards the interior of the unit.
- Check that the drawer is centred and lined up with the front of the unit, and that its
- drawer is aligned with the other appliance. Proceed as described in the section
- Entitled aligning the food-warmer drawer with another appliance
- Installed .
- Open the drawer and fasten it to the sides of the unit by screwing the two screws (not
- supplied) A (fig. 1.3).
- After the warming drawer is installed, the bottom of the appliance must no longer be
- accessible.
- Aligning the food-warmer drawer with another appliance
- Installed
- to adjust the depth of the food-warmer drawer, slacken screws A (fig. 1.4) and adjust
- brackets B (fig. 1.4) until the front panel is aligned with the other appliance.
- Tighten screws A (fig. 1.4) again until tightly fastened.
- The inclination of the front panel can
- be adjusted after slackening screws
- A (fig. 1.5). When the panel is parallel
- to the cabinet and to the front of the
- appliance installed in combination with
- it, tighten screws A (fig. 1.5) again
- until tightly fastened.
- Fig. 1.5
- Pannello
- frontale
- Fig. 1.4
- front panel
- The connection to the electrical
- network must be carried out by
- qualified personnel and must be
- according to existing norms.
- The appliance must be connected to
- the electrical network verifying above
- all that the voltage corresponds to the
- value indicated on the specifications
- plate and that the cables section of
- the electrical plant can bear the load
- which is also indicated on the plate.
- If the appliance is supplied without a
- connecting directly to the mains, a
- standardized plug suitable for the load
- The colours of the wires in the
- appliance power cable may not
- correspond with the colours marked
- on the terminals of your electrical plug.
- The plug should always be wired as
- follows
- connect the green/yellow wire to the
- terminal marked with the letter E
- or the earth symbol or coloured
- green/yellow
- connect the blue wire to the
- terminal marked with the letter N
- connect the brown wire to the
- terminal marked with the letter L
- The bi-polar plug must be connected to
- an outlet connected to the grounding
- unit in conformity to security norms.
- If the appliance is to be connected
- directly to the mains, it must be placed
- with an omnipolar switch with minimum
- opening between the contacts of 3 mm
- between the appliance and the mains.
- The power supply cable must not touch
- the hot parts and must be positioned
- so that it does not exceed 50 °C at any
- point.
- Once the appliance has been installed
- the switch or socket must always be
- If the power supply cable is damaged it
- must be substituted by a suitable cable
- available in the after sales service.
- N.B. For connection to the mains, do
- not use adapters, reducers or branching
- devices as they can cause overheating
- If the installation requires alterations to the
- domestic electrical system call an expert.
- He should also check that the domestic
- electrical system is suitable for the power
- absorbed by the appliance.
- The connection of the appliance to the
- grounding unit is mandatory.
- responsibility for any inconvenience
- resulting from the inobservance of this
- condition.
- Before carrying out any work on the
- electrical section of the appliance, it
- must be disconnected from the mains.
- IMPORTANT: The appliance must be
- installed by a qualified technician
- according with the current local
- regulations and in compliance with the
- manufacturer instructions. Incorrect
- damage to people, animals or property
- for which the manufacturer accepts no
- responsibility.
- authorised service agent in order to avoid a hazard.
- NOTE: The earth conductor must be left about 3 cm longer than the others.
- The operations must be executed by a qualified technician.
- Feeder cable specifications
- 220 V ac AWG 18/3 (*)
- (*) Connection possible with plug and outlet
- User guide
- 1. Glass surface (some models only)
- 2. On/Off pushbutton
- 3. Temperature control knob
- 4. On/Off indicator
- Notes
- The knobs and symbols may vary.
- The symbols may be printed on the knob itself or on the control panel.
- General features
- The warming drawer is equipped with an
- electrical heating element and a fan. The
- heat produced by the heating element and
- distributed throughout the drawer by the
- fan warms the crockery quickly and evenly.
- Models with non-slip mat: The non-slip
- mat on the base of the drawer prevents
- the sliding of crockery when the drawer is
- opened and closed.
- Note
- When using the drawer for the first time, in
- order to eliminate any traces of substances
- or odours left over from the production
- process, switch the drawer on and run it
- empty, keeping the installation environment
- sufficiently ventilated, for at least 1 hour
- with the control knob on .
- When the drawer has cooled down
- completely, unplug it from the mains power
- socket and clean inside it as described in
- Cleaning and maintenance .
- ATTENTION: During use the
- appliance becomes hot. Care should
- be taken to avoid touching heating
- elements inside the drawer.
- Do not store food or beverages
- inside the drawer, as their moisture
- could damage the appliance.
- NOTE: The knobs and symbols may
- vary. The symbols may be printed on
- the knob itself or on the control panel.
- Fig. 2.2
- Rotate the knob between the minimum and
- the maximum position until the required
- temperature is reached. This only sets the
- cooking temperature but does not switch
- Caution: Never force the thermostat
- and the minimum position. This might
- damage the appliance.
- The heating element turns off when the
- selected temperature is reached and turns
- back on when it decreases.
- Fig. 2.1
- Use of the warming drawer
- To use the warming drawer, proceed as
- put the crockery or food in the drawer.
- Select the temperature by rotating the
- thermostat control knob to the desired
- Switch on the drawer by pressing the
- pushbutton (fig. 2.1).
- When the drawer is closed, it is
- possible to check whether the
- appliance is functioning by looking at
- the indicator light on the front panel.
- After the crockery or food has warmed
- up, turn off the drawer by pressing the
- pushbutton and then take the crockery
- out.
- Depending on your model
- Your appliance may only have
- Some of these functions.
- Defrosting frozen food
- This function allows to gently defrost frozen
- food.
- Only the fan is switched on.
- The defrosting times vary according to the
- quantity and type of foods to be defrosted.
- Leavening or yogurt
- This function cuts the time it takes for your
- dough to rise.
- Put the dough in a suitable dish, cover
- it with a damp cloth and place it in the
- warming drawer. Set the knob on .
- Leavening times may vary according to
- dough type and room temperature.
- Yogurt fermentation
- Heat up 1 L of fresh full-cream milk
- at 80 °C, then let it cool down to 40 °C.
- Add 2 spoons of natural yogurt with
- living culture.
- To store the yogurt, use jars with screw
- lids. If possible, sterilize them before
- use.
- Fill the jars with the mixture, close
- them and place them in the centre
- of the warming drawer. Leave some
- space between jars, in order to let air
- circulate around them.
- Set the knob to and switch on the
- When the yogurt is ready, store it in the
- fridge.
- Heating cups
- This function allows the optimal preheating
- For heating times, refer to the HEATING
- TIME section.
- Heating plates
- of plates and serving dishes.
- Keeping food warm
- To keep meals warm, cover the dish with
- a heat resistant lid or aluminium foil, place
- it in the drawer and set the thermostat on
- introducing the food.
- The use of the warming drawer to keep
- meals warm is recommended for meat
- poultry, fish sauces, vegetables, garnishes
- It is recommended to warm meals in the
- warming drawer for maximum 1 hour.
- Caution! (Some models only) Do not
- place hot saucepans or pans in the
- warming drawer as this could damage
- tender and can be kept warm.
- To slow cook meat in the warming drawer, proceed as follows
- Preheat the tray following the instructions in USE OF THE WARMING DRAWER .
- Only use a suitable glass, porcelain or ceramic tray.
- Brown the meat with oil or butter.
- Place the tray in the drawer and set the thermostat on .
- Caution! (Some models only)
- Do not place hot saucepans or pans in the warming drawer as this could damage
Dimensions and finish
- Finish
- External dimensions
- Cutout dimensions
- glass surface since they can scratch the surface, which may
- Installation requires a compartment as illustrated in figures 1.1 or 1.2.
- Installation in combination with another appliance: The housing unit must have
- frame is levelled and sitting evenly on the shelf.
- Installation in combination with another appliance: check that the food-warmer
- installation may cause harm and
- control knob between the maximum
Electrical and installation
- power supply plug and if you are not
- Connection of the power supply cable
Documents
- Data sheet: IT0022515
- drawings: IT0022515
- Manual: IT0022515
02
TECHNICAL DETAILS
Specifications
SKU / ModelEL 14B DW
BrandElba
Outside dimensions (per Elba product data)60cm
Size60 cm
DimensionsW 595 x H 140 x D 595 mm
Temperature range30° to 80°C
Net liters capacity24 L
03
BEFORE INSTALLATION
Installation & dimensions
Plan around the appliance
Confirm cabinetry, service connections and final site dimensions before manufacturing or installation. Where brand installation is available, KitchenByPro coordinates through the relevant authorised service centre.
- Measurements are listed in millimetres unless another unit is shown, and are taken from the product's own technical data.
- Installation is available through the brand's authorised service centre at an additional charge. The final amount is confirmed by the service centre for your site.
- Delivery is managed by the brand. Timings are confirmed after the order is processed.
Outside dimensions60cm
Size60 cm
DimensionsW 595 x H 140 x D 595 mm
Net liters capacity24 L
04
CUSTOMER FEEDBACK
Reviews
No product reviews have been published yet.
WHY BUY FROM KITCHENBYPRO
Buying from us
Official WarrantyBrand warranty where applicable
Expert Product SupportAsk Pro before or after purchase
Flexible PaymentsOptions shown at checkout
Secure CheckoutProtected payment flow
CM Appliances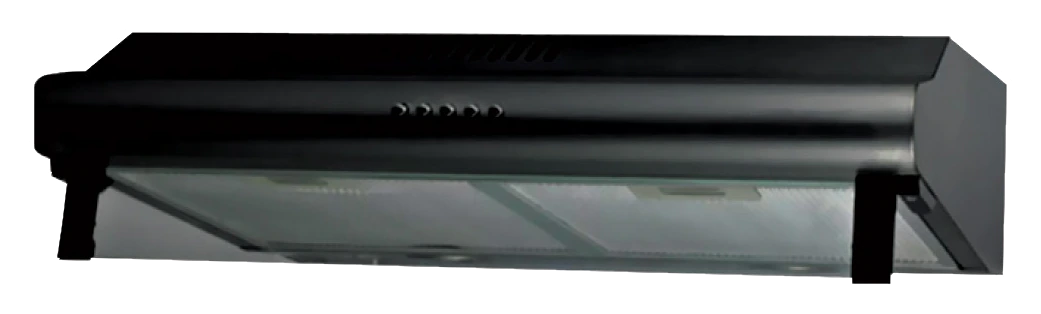 CM Appliances
CM C3 PUSH BUTTON – BLACK Under-Cabinet Hood 90 cm
AED 401.25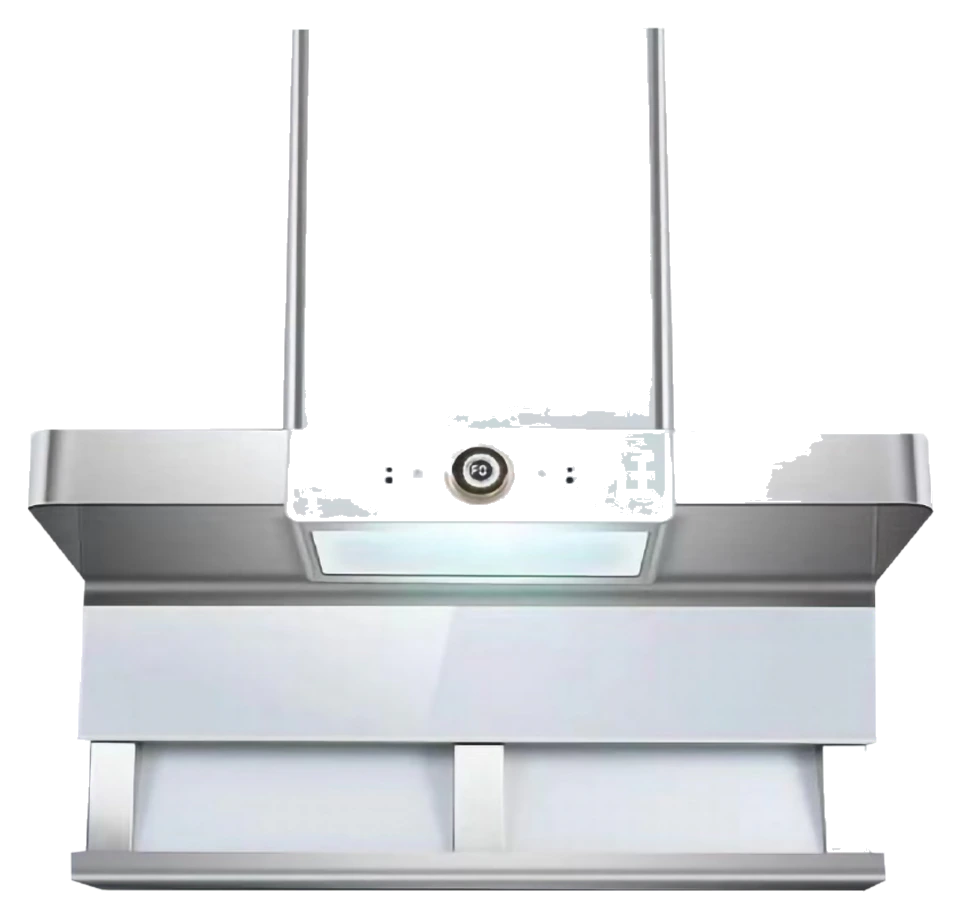 CM Appliances
CM AMBER BIANCO White Hood
AED 3,424 CM Appliances